Tutorial: Full dashboard UI in Shiny and Fluent
Source:vignettes/st-sales-reps-dashboard.Rmd
st-sales-reps-dashboard.RmdThis is Part 2 of shiny.fluent tutorial.
In Part 1 we built a pretty functional app, but honestly, it doesn’t look particularly great. Let’s now build a good looking dashboard UI for that app. It will have a top command bar with a title, a sidebar with navigation, and multiple pages handled by router.
Prerequisites
We are starting with the code Part 1 ends with.
Let’s start by changing the beginning of our file to load all libraries that we will use in this example. Make sure to install the ones you don’t have yet installed (if any).
Single page layout
As a next step, let’s add a title and subtitle to our current app.
We’ll create a helper function and call it makePage, so
that it is easy to add more pages in the same fashion.
makePage <- function (title, subtitle, contents) {
  tagList(div(
    class = "page-title",
    span(title, class = "ms-fontSize-32 ms-fontWeight-semibold", style =
           "color: #323130"),
    span(subtitle, class = "ms-fontSize-14 ms-fontWeight-regular", style =
           "color: #605E5C; margin: 14px;")
  ),
  contents)
}
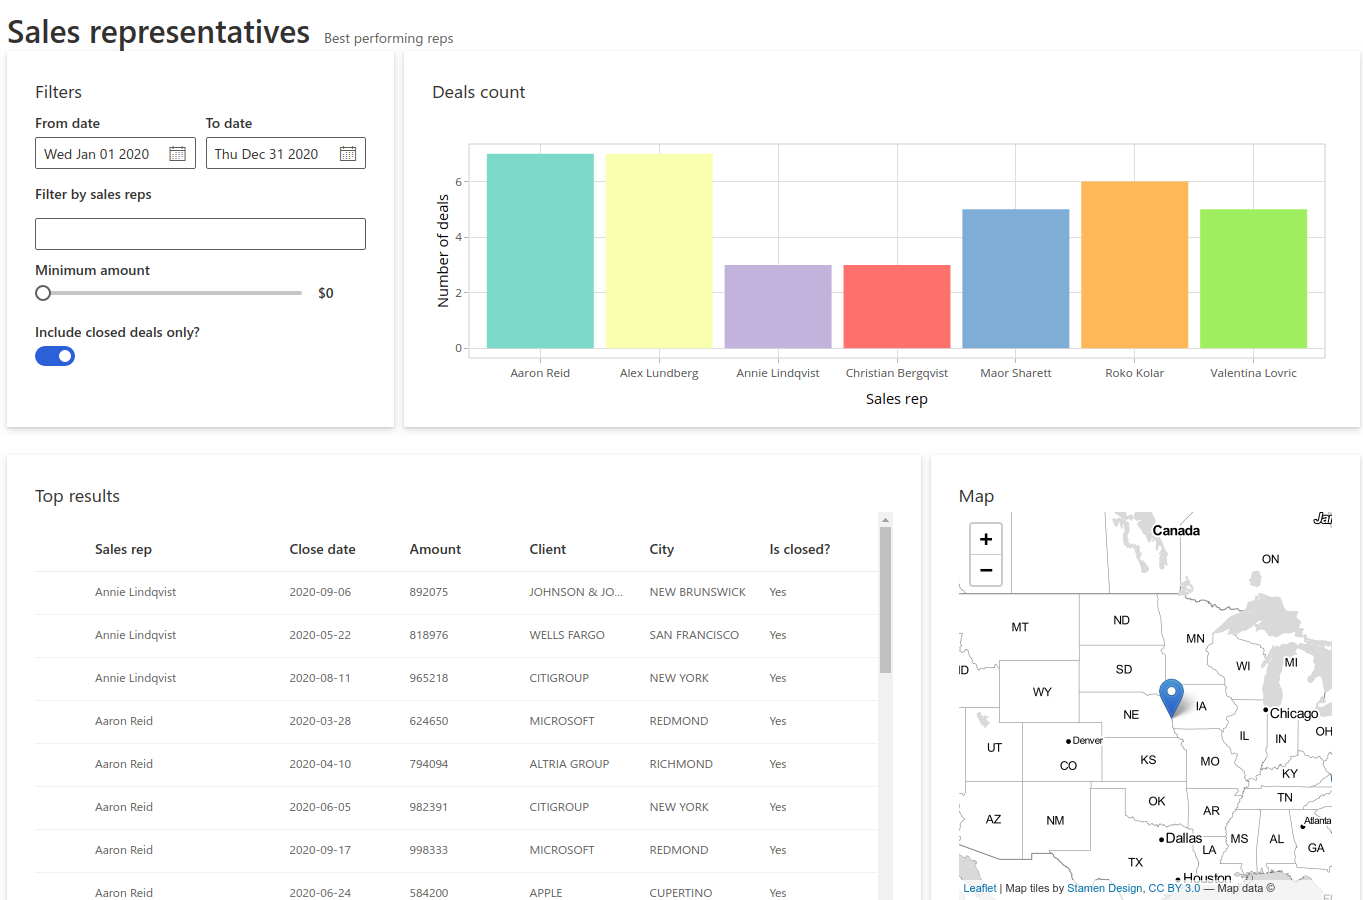
We can now take our entire UI built so far and put it in a “page” layout, giving it a helpful title and subtitle.
analysis_page <- makePage(
  "Sales representatives",
  "Best performing reps",
  div(
    Stack(
      horizontal = TRUE,
      tokens = list(childrenGap = 10),
      makeCard("Filters", filters, size = 4, style = "max-height: 320px"),
      makeCard("Deals count", plotlyOutput("plot"), size = 8, style = "max-height: 320px")
    ),
    uiOutput("analysis")
  )
)

ui <- fluentPage(
  tags$style(".card { padding: 28px; margin-bottom: 28px; }"),
  analysis_page
)
Dashboard Layout
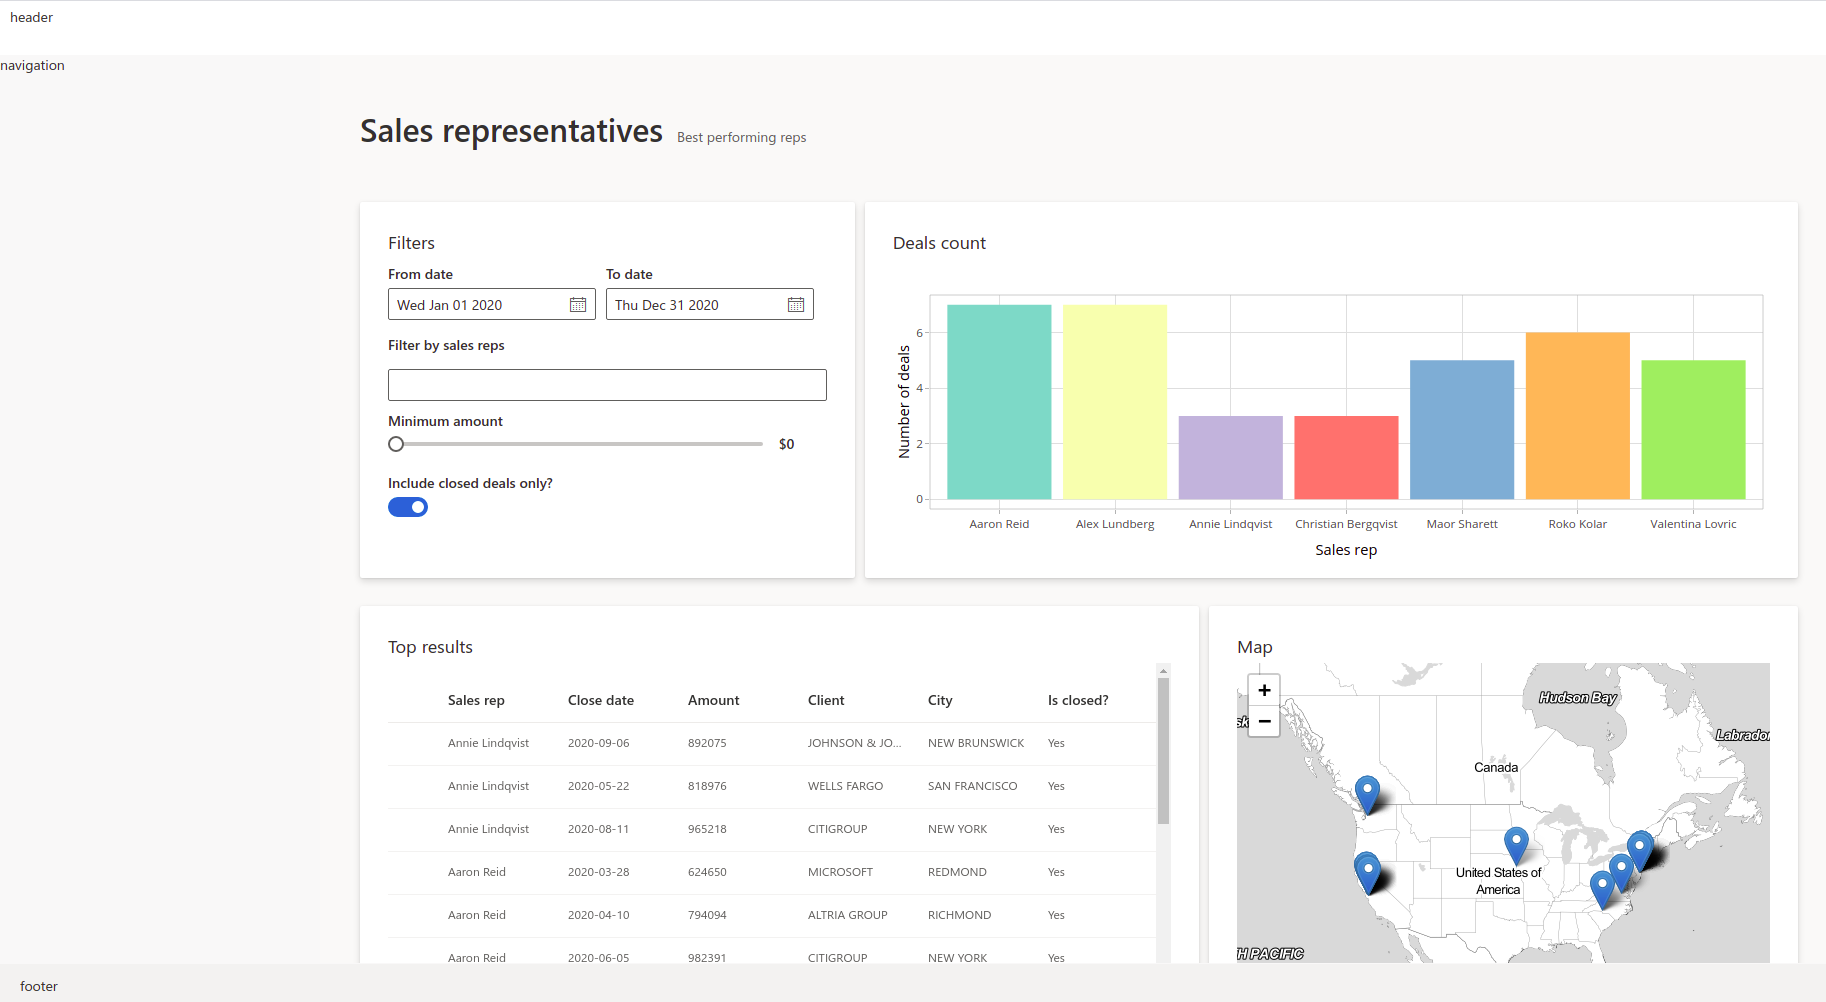
It’s time to create a place for our header, navigation sidebar and footer. We’ll use CSS grid for that. It’s a modern, flexible and staightforward way to achieve such a layout.
We start by creating divs for each of the areas, with placeholder texts that we will later replace.
header <- "header"
navigation <- "navigation"
footer <- "footer"

layout <- function(mainUI){
  div(class = "grid-container",
      div(class = "header", header),
      div(class = "sidenav", navigation),
      div(class = "main", mainUI),
      div(class = "footer", footer)
  )
}
Now it’s time to tell the browser using CSS how to arrange these
areas. To define how our areas should be laid out on the page, let’s put
the following rules in www/style.css:
.grid-container {
  display: grid;
  grid-template-columns: 320px 1fr;
  grid-template-rows: 54px 1fr 45px;
  grid-template-areas: "header header" "sidenav main" "footer footer";
  height: 100vh;
}

.header {
  grid-area: header;
  background-color: #fff;
  padding: 6px 0px 6px 10px;
  display: flex;
}

.main {
  grid-area: main;
  background-color: #faf9f8;
  padding-left: 40px;
  padding-right: 32px;
  max-width: calc(100vw - 400px);
  max-height: calc(100vh - 100px);
  overflow: auto;
}

.footer {
  grid-area: footer;
  background-color: #f3f2f1;
  padding: 12px 20px;
}

.sidenav {
  grid-area: sidenav;
  background-color: #fff;
  padding: 25px;
}
We can also use this opportunity to add some additional styling for the entire page, and add the following rules to the same file:
body {
  background-color: rgba(225, 223, 221, 0.2);
  min-height: 611px;
  margin: 0;
}

.page-title {
  padding: 52px 0px;
}

.card {
  background: #fff;
  padding: 28px;
  margin-bottom: 28px;
  border-radius: 2px;
  background-clip: padding-box;
}
Now we only need to update our UI definition to load styles from
www/style.css and use the new layout.
ui <- fluentPage(
  layout(analysis_page),
  tags$head(
    tags$link(href = "style.css", rel = "stylesheet", type = "text/css")
  ))
Filling all the areas
Great! Now it’s time to fill those areas with something. We can start with the header.
Header
Let’s replace the previous header definition with:
header <- tagList(
  img(src = "appsilon-logo.png", class = "logo"),
  div(Text(variant = "xLarge", "Sales Reps Analysis"), class = "title"),
  CommandBar(
    items = list(
      CommandBarItem("New", "Add", subitems = list(
        CommandBarItem("Email message", "Mail", key = "emailMessage", href = "mailto:me@example.com"),
        CommandBarItem("Calendar event", "Calendar", key = "calendarEvent")
      )),
      CommandBarItem("Upload sales plan", "Upload"),
      CommandBarItem("Share analysis", "Share"),
      CommandBarItem("Download report", "Download")
    ),
    farItems = list(
      CommandBarItem("Grid view", "Tiles", iconOnly = TRUE),
      CommandBarItem("Info", "Info", iconOnly = TRUE)
    ),
    style = list(width = "100%")))
As you can see, we’re using CommandBar and
CommandBarItem from shiny.fluent. We also need to add a bit
of styling to our CSS file:
Navigation in the sidebar
Nav is a very powerful component from Fluent UI. It has
very rich configuration options, but we will use it to show just a
couple of links:
navigation <- Nav(
  groups = list(
    list(links = list(
      list(name = 'Home', url = '#!/', key = 'home', icon = 'Home'),
      list(name = 'Analysis', url = '#!/other', key = 'analysis', icon = 'AnalyticsReport'),
      list(name = 'shiny.fluent', url = 'http://github.com/Appsilon/shiny.fluent', key = 'repo', icon = 'GitGraph'),
      list(name = 'shiny.react', url = 'http://github.com/Appsilon/shiny.react', key = 'shinyreact', icon = 'GitGraph'),
      list(name = 'Appsilon', url = 'http://appsilon.com', key = 'appsilon', icon = 'WebAppBuilderFragment')
    ))
  ),
  initialSelectedKey = 'home',
  styles = list(
    root = list(
      height = '100%',
      boxSizing = 'border-box',
      overflowY = 'auto'
    )
  )
)
Footer
Footer is relatively straightforward - we can put anything we want
there. Here we use Text for typography (setting uniform
font styling). We also use Stack to arrange elements
horizontally and with bigger gaps.
footer <- Stack(
  horizontal = TRUE,
  horizontalAlign = 'space-between',
  tokens = list(childrenGap = 20),
  Text(variant = "medium", "Built with ❤ by Appsilon", block=TRUE),
  Text(variant = "medium", nowrap = FALSE, "If you'd like to learn more, reach out to us at hello@appsilon.com"),
  Text(variant = "medium", nowrap = FALSE, "All rights reserved.")
)


layout <- function(mainUI){
  div(class = "grid-container",
      div(class = "header", header),
      div(class = "sidenav", navigation),
      div(class = "main", mainUI),
      div(class = "footer", footer)
  )
}

# ---
ui <- fluentPage(
  layout(analysis_page),
  tags$head(
    tags$link(href = "style.css", rel = "stylesheet", type = "text/css")
  ))
Let’s see how this looks together.
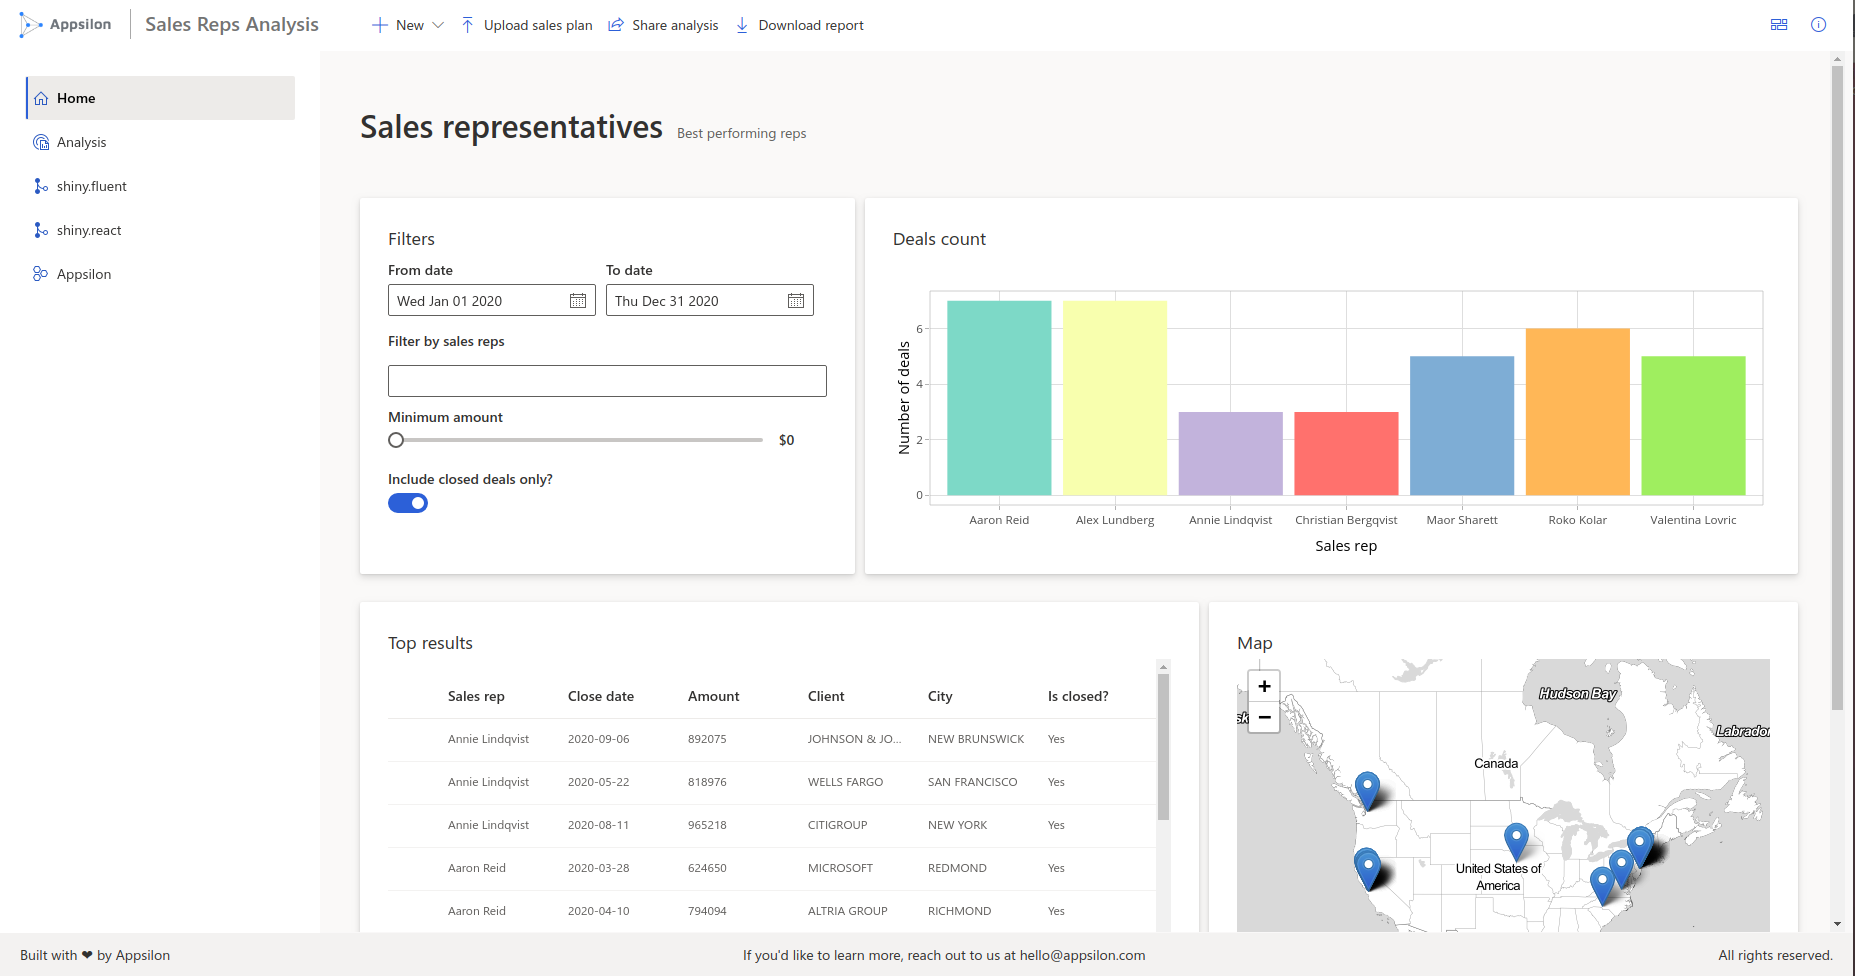
Additional pages
Home page
The one final step is to add additional pages. Let’s make a home page, consisting of two cards with some welcome text.
card1 <- makeCard(
  "Welcome to shiny.fluent demo!",
  div(
    Text("shiny.fluent is a package that allows you to build Shiny apps using Microsoft's Fluent UI."),
    Text("Use the menu on the left to explore live demos of all available components.")
  ))

card2 <- makeCard(
  "shiny.react makes it easy to use React libraries in Shiny apps.",
  div(
    Text("To make a React library convenient to use from Shiny, we need to write an R package that wraps it - for example, a shiny.fluent package for Microsoft's Fluent UI, or shiny.blueprint for Palantir's Blueprint.js."),
    Text("Communication and other issues in integrating Shiny and React are solved and standardized in shiny.react package."),
    Text("shiny.react strives to do as much as possible automatically, but there's no free lunch here, so in all cases except trivial ones you'll need to do some amount of manual work. The more work you put into a wrapper package, the less work your users will have to do while using it.")
  ))

home_page <- makePage(
  "This is a Fluent UI app built in Shiny",
  "shiny.react + Fluent UI = shiny.fluent",
  div(card1, card2)
)
If we replace analysis_page with home_page
in our ui, we can even see this page. However, there’s one
problem: we don’t have a way to switch between pages! This is where
so-called page routing comes into play.
Adding shiny.router
To enable switching between pages we will use the shiny.router package. This way we will also have shareable URLs to individual pages.
The first step is to define the available routes:
Now, we need to put router in the place where we want
the selected page to appear.
ui <- fluentPage(
  layout(router),
  tags$head(
    tags$link(href = "style.css", rel = "stylesheet", type = "text/css")
  ))
One final step is to add this single line to our server
function, which otherwise remains untouched from the Part 1 of the
tutorial.