In this tutorial we will walk you through the basics of routing with
the shiny.router library.
In a web application, routing is the process of using URLs to drive the user interface. Routing adds more possibilities and flexibility while building a complex and advanced web application, offering dividing app into separated sections.
Let’s build together a simple app that has two subpages and captures the data from url parameters.
We start by importing the packages.
Next, we create the content of our subpages: “home” and “another”.
home_page <- div(
  titlePanel("Home page"),
  p("This is the home page!"),
  uiOutput("power_of_input")
)

another_page <- div(
  titlePanel("Another page"),
  p("This is the another page!"),
)
Optionally, we can create a menu to easier navigate on our webapp:
menu <- tags$ul(
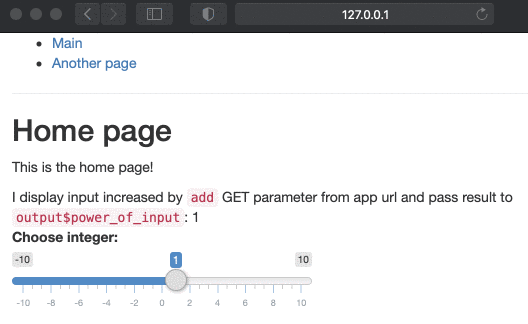
tags$li(a(class = "item", href = route_link("/"), "Main")),
tags$li(a(class = "item", href = route_link("another"), "Another page")),
)Now, we create an output for our router in main UI of Shiny app. We
also add sliderInput to test its functionality.
ui <- fluidPage(
  menu,
  tags$hr(),
  router_ui(
    route("/", home_page),
    route("another", another_page)
  ),
  sliderInput("int", "Choose integer:", -10, 10, 1, 1),
)
Then, we plug router into Shiny server (note:
router_server() at the beginning).
server <- function(input, output, session) {
  router_server()
}
In theory that would be it, but additionally we can also introduce
the mechanism of catching the parameters from the URL. We will use
get_query_param function. Our modified Server code may look
like this:
server <- function(input, output, session) {
  router_server()

  component <- reactive({
    if (is.null(get_query_param()$add)) {
      return(0)
    }
    as.numeric(get_query_param()$add)
  })

  output$power_of_input <- renderUI({
    HTML(paste(
      "I display input increased by <code>add</code> GET parameter from app url and pass result to <code>output$power_of_input</code>: ",
      as.numeric(input$int) + component()))
  })
}
It’s time to run it.
shinyApp(ui, server)Here you can see the final result:
Feel free to copy the code of this example and test it on your own!